| Post Effects/ Animated Lens Flare |
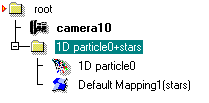
Animated Lens FlareParticle effect properties, such as the rotation angle of lens flare streaks, can be animated easily using key framing: simply enter a suitable attribute value on the property window, with animation recording turned on. In this example, we show how to set up a more complicated system: the rotation angle of flares based on the cameras orientation. Tutorial level: Advanced Example project: 'tutorprojects/postprocessing/rotatingflares' 1. First create the camera: activate the camera tool and hit 'Accept' to record the current view to the camera. Turn animation recording on and go to the last frame of the animation. Open the camera's property window, go to the 'Gen' tab and change the 'Rotation' fields first component by say 180 degrees (for example from zero to 180 degrees). Then turn animation recording off. Camera heading will now change during the animation half a revolution. 2. Activate the particle tool and create some random 1D particles, then hit 'Accept' button to finish the tool. Open the property window, go to 'Spec' tab and turn off the 'Rendering/Scanline' option. Particles will be rendered using only post effect flares. 3. Go to the Post particle effects tab of the Select window. Drag&drop the 'Stars' effect (or another lens flare) to the view to map it to selected particles. Render the view to make sure that flares work as expected (if not, make sure that the view window's post effect configuration includes particle effect rendering). 4. While the 'Stars' effect is still selected, right click and pick the popup menu 'Make Choreographable' on the select window. Next open the Choreographs window from the 'Animation' pulldown menu. 5. On the Choreography window, select the stars:init0 item. Select New/Keyframer from the popup menu. Double click the stars:init0 item to open it, and select the keyframer1 object under it. Switch to the 'Input' tab. Then go to the Select window, switch to the object geometry tab and select the camera object. On the choreography window, set Input=Geometric Object and click the Change button. The 'Input' area is changed to show camera attributes. Select 'Rotate Quaternion.x' from the attribute list - in other words, the cameras heading angle will act as the input for the flare animation. 6. Switch to the 'Time lines' tab of the choreography window. Make sure that the keyframer1 item is still selected, and define a time line 'Start'=-180, 'End'=180 using the numeric fields on the bottom of the window. This timeline covers one cycle of the input parameter (=camera's heading angle). To ensure that all heading angle values become mapped to the range where the animation curve is defined, set the Periodic option at the bottom of the choreography window. 7. Next we define what to animate. Switch to the 'Animateable Attributes' tab and pick 'Star Angle' from the list. Check the 'Animated' option above the list. 8. Finally go to the Properties tab of the choreography window. Activate the Star Angle item under the Keyframer1 choreography. Then move the mouse over the curve gadget and select Create predefined curve/45 degree. curve from its popup menu. A diagonal line appears; activate the start point and change its coordinates to X=-180, Y=-180 degrees. Activate the end point and change it to X=180, Y=180 degrees. In other words, the curve maps the cameras heading angle to the identical lens flare streak angle. Other kinds of curves could be used as well, of course.
The animation is now ready. Render it to an AVI file to see rotating streaks.
|


 |
 |